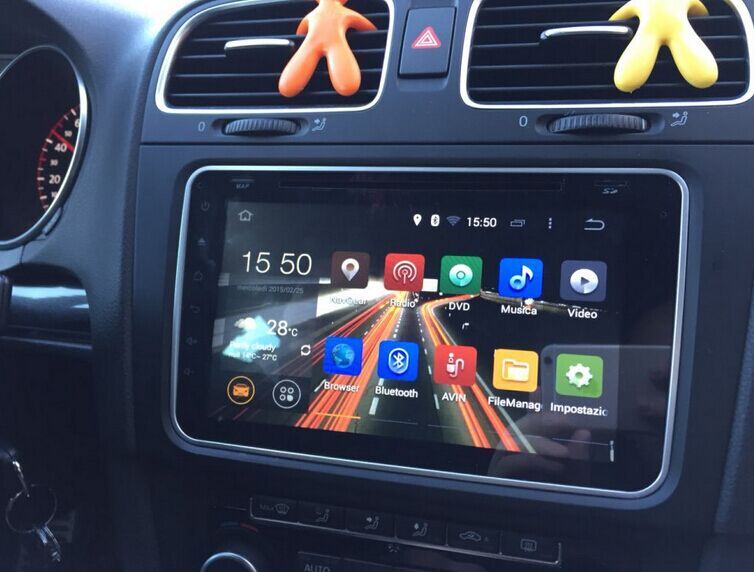
How to Install Touch Screen Car Stereo
Thanks to a lot of radio options available in the market, you have a number of available options to replace your stock car stereo with. If you want to spruce up your car and invest in a new car stereo, a touch screen car stereo is your best bet. It provides a sleek and modern look as well the functionality of having access to your music files just with the touch of a finger. Most touch screen car stereos also come with additional features such as Bluetooth connectivity and hands-free functions that fit well with your lifestyle.
Professional installation of a touch screen car stereo can cost hundreds of dollars. Plus, there is no guarantee that your vehicle and your new stereo will get the quality treatment they deserve. If you want to install your new touch screen car stereo yourself, here is a comprehensive guide to getting you going. All you need are the proper tools and the right skills and ample time to get it together.
What You Will Need
- New touchscreen car stereo unit
- Screwdrivers
- Wrench
- Panel removal tools
- DIN tools

Via: carjoying.com
Step 1: Prepare all the Tools
Prior to installation, make sure that you have all the tools that you need within reach. Remember that it is easier to complete the project when you do not need to go back and forth to get the tools that you need. Also, make sure that you have a detailed plan regarding the steps that you are going to take. Also make sure that you have purchased all the necessary hardware, as some models may need additional equipment to be attached before installation.
Step 2: Disconnect the Battery
Prior to any removal or installation of a car stereo, make sure to remove the negative cable from the battery to avoid electrical shock or damage to the electric components. Make sure that the battery is disconnected before doing any electrical work as you do not want to get electrocuted in the process.
Step 3: Remove the Panels
Before you can get to the head unit, some cars may require having the panels removed to be able to gain access to the head unit. For this, you may need a special prying tool. Take extra caution when removing the panels as you will need to reinstall them later on. Set aside the panels in preparation for the installation.
Step 4: Remove the Head Unit
The head unit is the one that controls the car system. Before removing the head unit, you will want to make sure that your new unit is the same size. Head units come in two sizes. It can be single din, which is an 180 by 50mm panel, or 180 by 100mm panel, which is known as a double din. Carefully unscrew any bolts that may be attached to the head unit. Once you have it loose, pull out the head unit. You may want to make sure that the head unit is not damaged in the process as you may want to keep it for future use, especially for when you will need to resell your car, you will want to install the old head unit and keep the new touch screen car stereo for yourself.
Step 5: Disconnect the Wires
You will be met with a colorful entanglement of wires. Do not let this discourage you. Most wiring is attached to a wiring harness which makes it easier to work with. Carefully disconnect the wires making sure that you do not snap or break them apart. You will need all the wiring for the installation of your new touch screen car stereo. Disconnect the antenna cables as well. Carefully pry apart the wire harness that attaches the car stereo to the car.
Step 6: Connect the Wires
Once you disconnect the wiring from the old car stereo, re-connect them to the new touch screen car stereo. You will want to connect the antenna cables as well. Make sure that you attach the right wiring to the right port. Some wiring may need soldering or crimping for connection. Use caution in using electrical tape for connection, as this is not very durable and may become brittle due to high temperatures.
Step 7: Check the Connection
After making attaching the wiring to your new touch screen car stereo, turn on the car and the radio. If you cannot hear any sound or if the sound quality is affected, you may want to rewire the car stereo all over again.
Step 8: Check the Sources
Also make sure that you check all audio sources such as AM, FM, CD, Bluetooth, etc., to make sure that they are working. If any function is not working, you may want to check the connections again or refer to the installation manual.
Step 9: Secure the Stereo
Once you are sure that all functions are working, make sure that all the wires have been inserted back into the dashboard. Secure and fasten your new touch screen radio by using the necessary bolts and screws. If any panel has been removed before installation, make sure to re-install them according to the instructions.
Step 10: Turn up the Volume and Take it for a Ride
With your new touch screen stereo just installed, you may want to take her for a test ride. Turn up the volume and appreciate all your work and effort.
Once your new stereo is up and running, you will realize that the work and effort that you put in were well worth it. Not only now does your stereo looking dashing, but you can actually beam with pride knowing that you did it yourself.
That is our guide to install new touch screen stereo by the steps. You can see the video below to get more detail. If you have any question, please leave the comments, we can help you, thanks

